Get Started
Set up your workshop environment
What you’ll do
Claim an OpenRouter API key from our Discord bot, make your own copy of the workshop environment, add the key as a Codespaces secret, then launch a codespace.
You only need a web browser, a GitHub account, and a Discord account.
Step 1: Join the workshop Discord
Open the workshop Discord invite and accept it.
Then ask a TA or instructor (in Discord or in person) to give you the Participant role. The bot only hands out keys to people who have it.
Step 2: Claim your key with /claim
In any channel, type /claim and press Enter. The bot replies in the channel, but the message is visible only to you.
The reply contains your OpenRouter API key and your daily budget. Copy the key now — you’ll paste it into GitHub in step 9.
Useful later: /key shows your key again, /usage shows today’s spend.
Step 3: Sign in to GitHub
Before you touch any buttons on GitHub, make sure you are signed in. Go to github.com/login and sign in, or create a free account if you don’t have one.
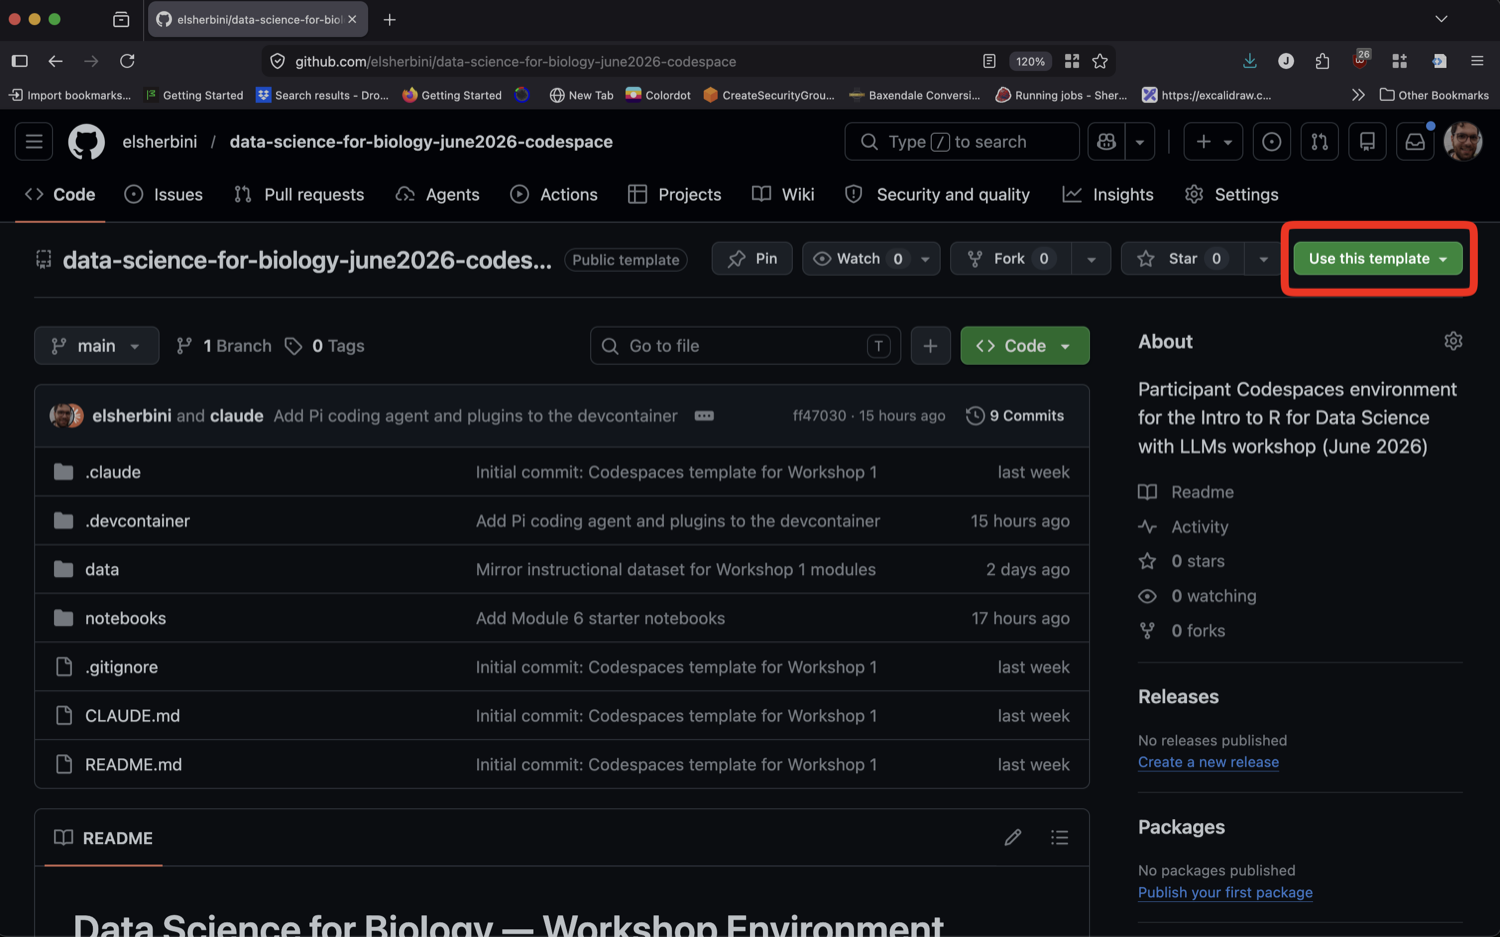
GitHub hides the “Use this template” and “Code” buttons from signed-out visitors — if you’re not logged in, the next steps won’t show them.
Step 5: Create a new repository
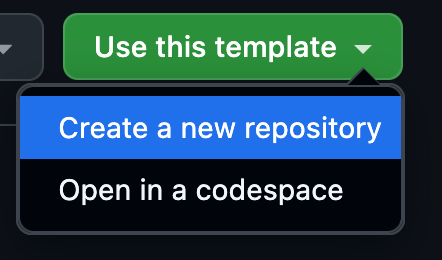
In the dropdown, choose “Create a new repository”.
![Use this template dropdown with 'Create a new repository' highlighted]()
Step 6: Name your repository
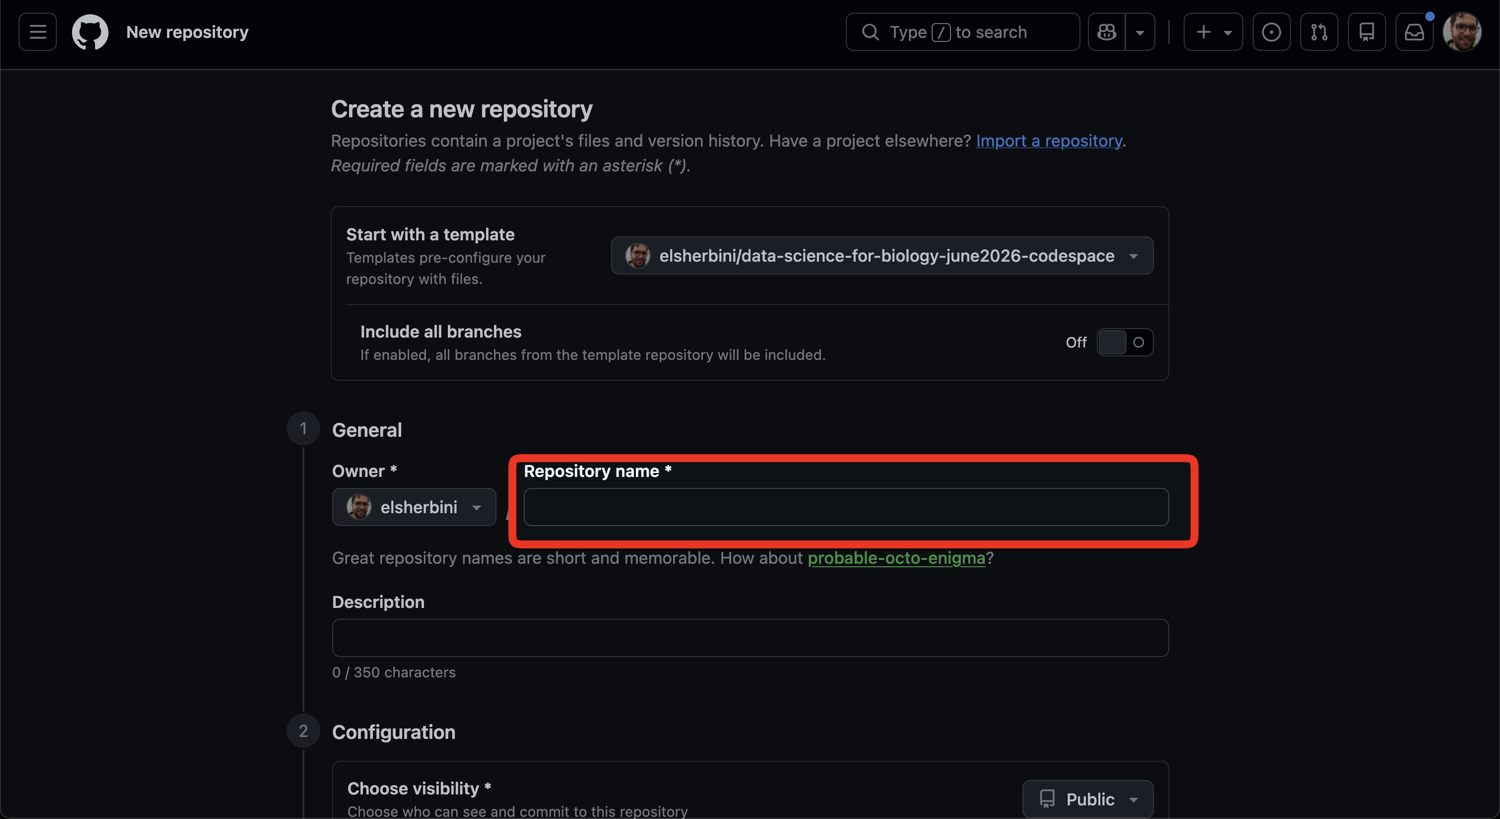
Give it a name (for example, workshop-2026) and click the green “Create repository” button.
![New repository form with the Repository name field highlighted]()
Step 8: Click “New secret”
Scroll to “Codespace user secrets” and click “New secret”.
![Codespace user secrets section with the New secret button highlighted]()
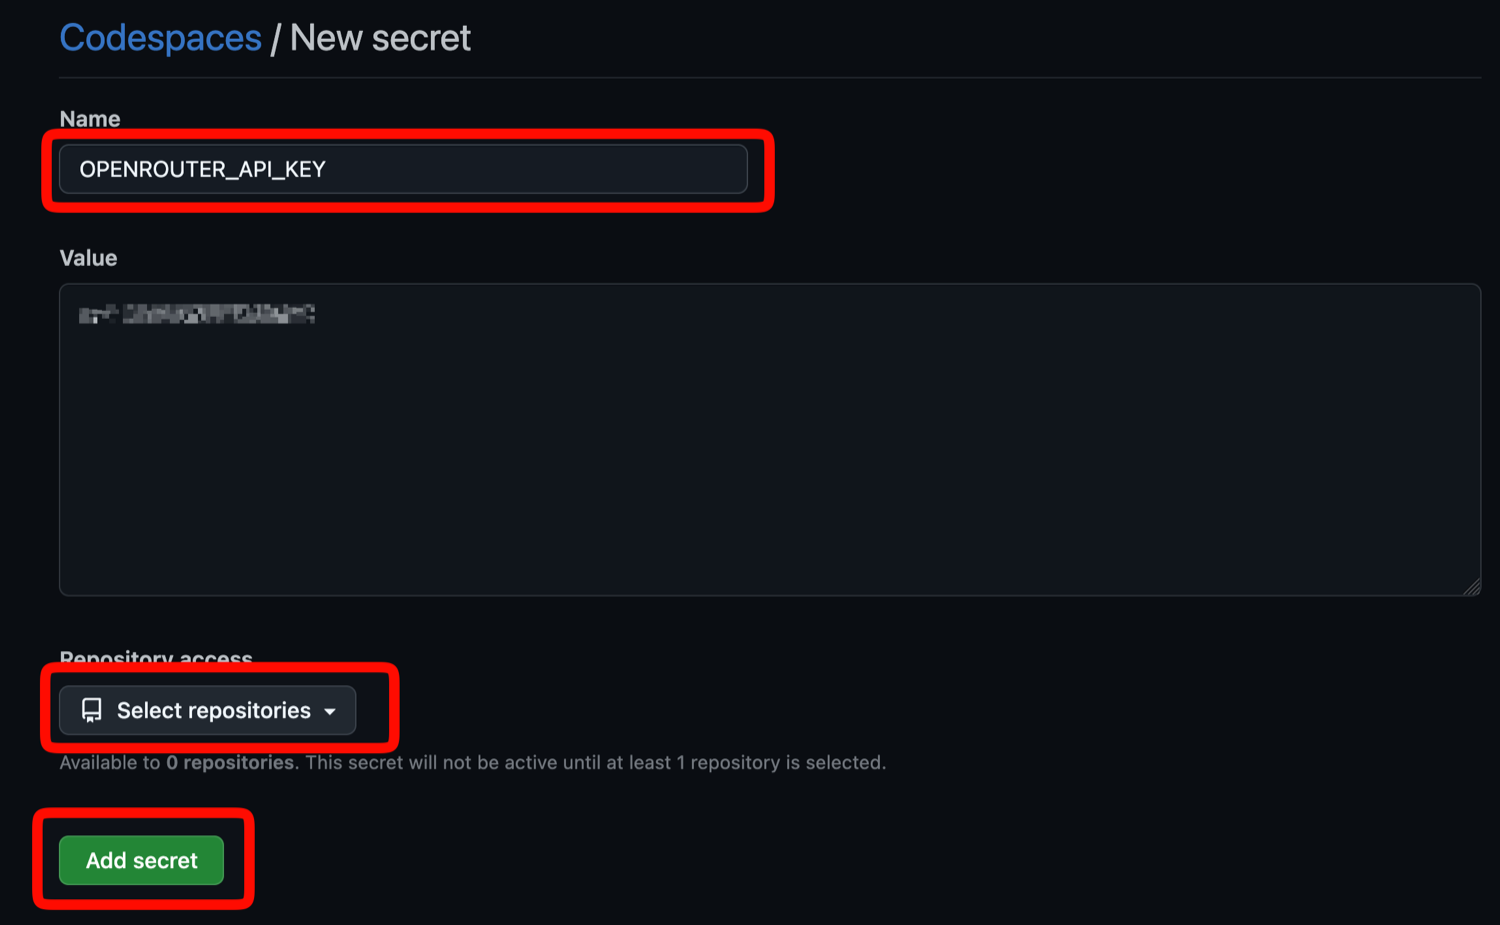
Step 9: Fill in and save the secret
- Name:
OPENROUTER_API_KEY (exact spelling)
- Value: paste the key the Discord bot gave you in step 2
- Repository access: select the repo you created in step 6
- Click “Add secret”
![New secret form with Name, Repository access, and Add secret highlighted]()
Step 10: Launch a codespace
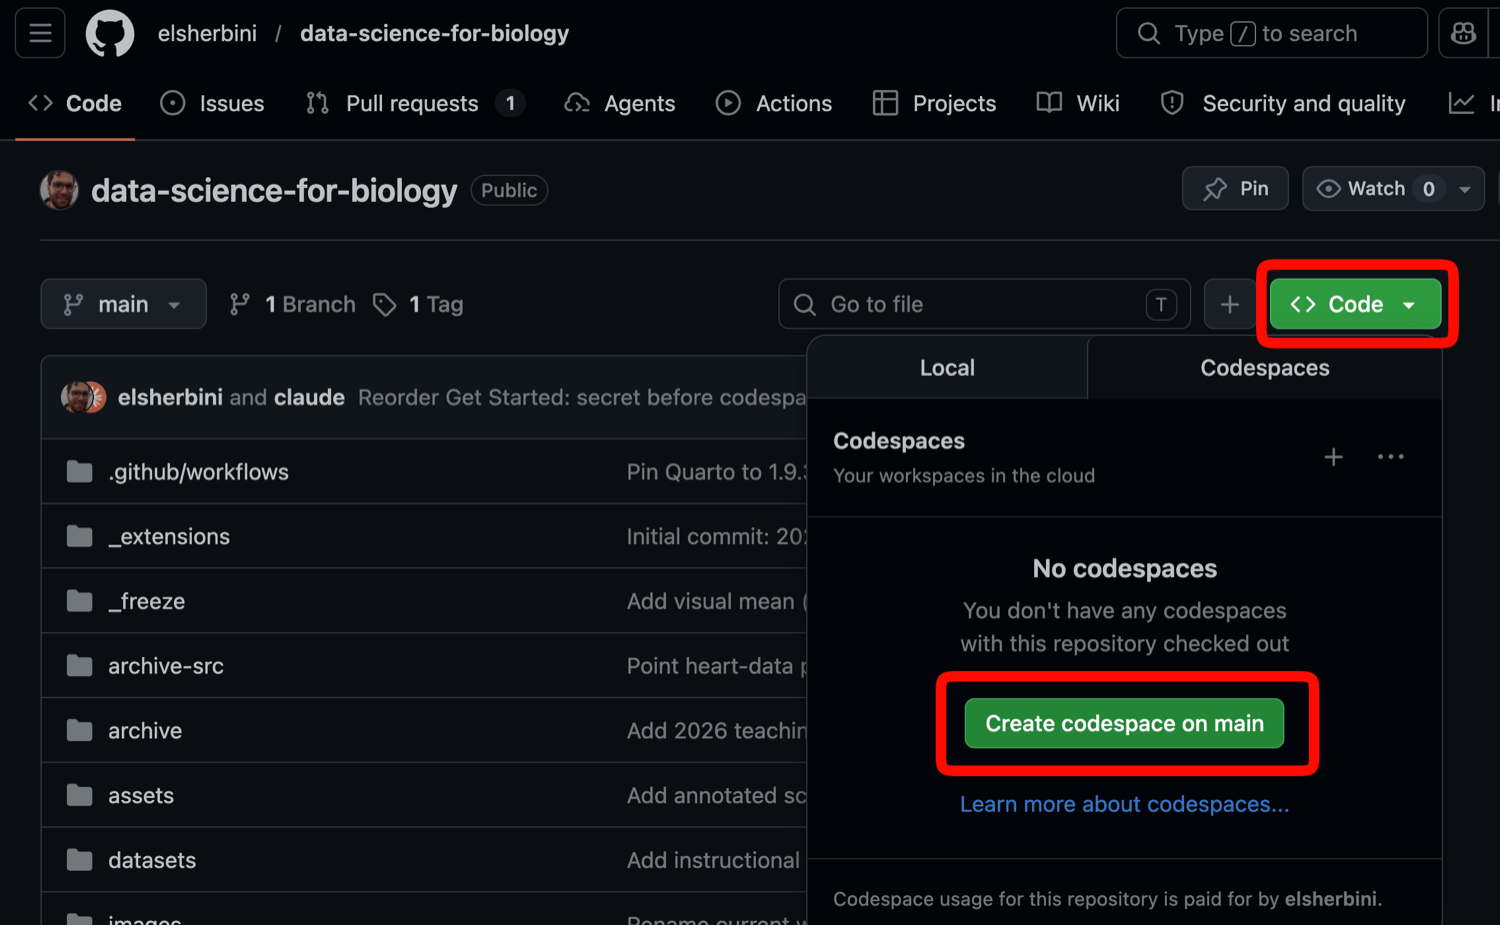
Go back to your new repo. Click “Code” → “Codespaces” tab → “Create codespace on main”.
First build takes ~10 minutes or more (installing R, Quarto, packages, Pi).
![Repository page with the Code button and Create codespace on main button highlighted in the Codespaces tab]()
Step 11: Open a notebook
Once the codespace finishes building:
- Use the file explorer (left side) to find a
.qmd notebook
- Open it to start working — edit text and code right in the browser
Step 12: Meet Pi
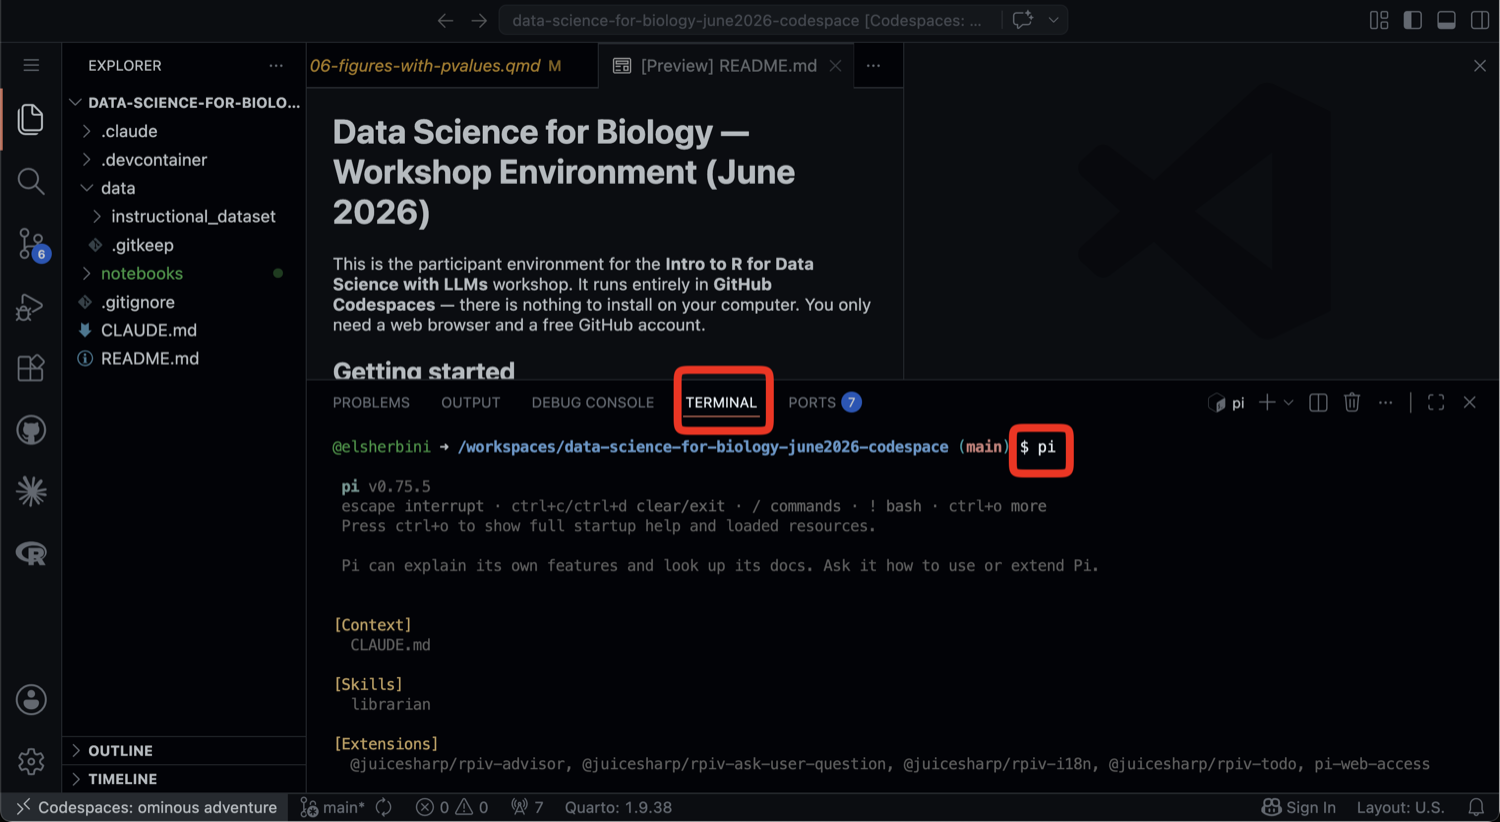
Open the integrated terminal (Terminal → New Terminal), then run pi.
Ask in plain language — Pi can read your notebook, explain code, and help you edit. (We will introduce Claude Code later in the workshop.)
![Codespace with the integrated terminal open and the pi command typed at the prompt]()
You’re ready
Head into the workshop materials.
If you get stuck, ask an instructor or a teaching assistant.